目标
使用猫狗数据集在本地电脑做迁移学习,获得能在手机上使用的SSD MobileNet模型
Github地址
这里需要下载research下面object_detection,slim两个项目,并保持在research下的目录结构
参考教程Training and serving a realtime mobile object detector in 30 minutes with Cloud TPUs
本文在教程的基础上做出一定的修改使其可以在本地运行,教程中的详细说明不再重复,仅列出需要注意的内容。
环境
Ubuntu 18.04.2 下使用docker镜像:
tensorflow/tensorflow 1.15.0-gpu-py3
nvidia/cuda 10.1-devel
过程
-
下载数据集
tfrecord文件下载地址
数据集包括7400张图片(37个猫狗种类各200张)
pet_label_map.pbtxt 文件是37个宠物分类(label文件) -
使用SSD MobileNet checkpoint文件作迁移学习
checkpoint文件下载地址-ssd_mobilenet_v1_0.75_depth_coco ☆
解压ssd_mobilenet_v1_0.75_depth_300x300_coco14_sync_2018_07_03.tar.gz
使用model.ckpt.* 3个文件 -
配置config文件
config文件使用ssd_mobilenet_v1_pets.config
本文使用单块1070ti进行训练,batchsize最大只能设置16
在config文件末尾增加量化设置
1 | graph_rewriter { |
- 文件结构
+research
+object_detection
+slim
+pycocotools
+<存放猫狗数据和模型的文件夹>
+data
-预训练模型ckpt
-label_map file
-train TFRecord file
-eval TFRecord file
+models
+ model
-pipeline config file
+train
+eval
- 配置环境
1 | pip install Cython contextlib2 pillow lxml matplotlib -i https://pypi.tuna.tsinghua.edu.cn/simple/ |
安装COCO API
1 | git clone https://github.com/cocodataset/cocoapi.git |
最后一步是将编译好的pycocotools文件夹放到/research目录下,与/object_detection和/slim平级
安装protoc 3.0
可以使用sudo apt-get install protobuf-compiler安装,如果编译有问题,则需要手动安装如下
1 | wget -O protobuf.zip https://github.com/google/protobuf/releases/download/v3.0.0/protoc-3.0.0-linux-x86_64.zip |
编译Protobufs
1 | protoc object_detection/protos/*.proto --python_out=. |
这里的protoc可以是apt安装的,或者是手动下载解压出来的protoc文件
注意,这里的编译路径务必严格按照上文列出的目录形式,这是在proto文件里写死的import地址,否则需要修改全部的proto文件
- 测试
1 | python object_detection/builders/model_builder_test.py |
- 启动:
1 | PIPELINE_CONFIG_PATH={path to pipeline config file} |
- Tensorboard查看训练过程
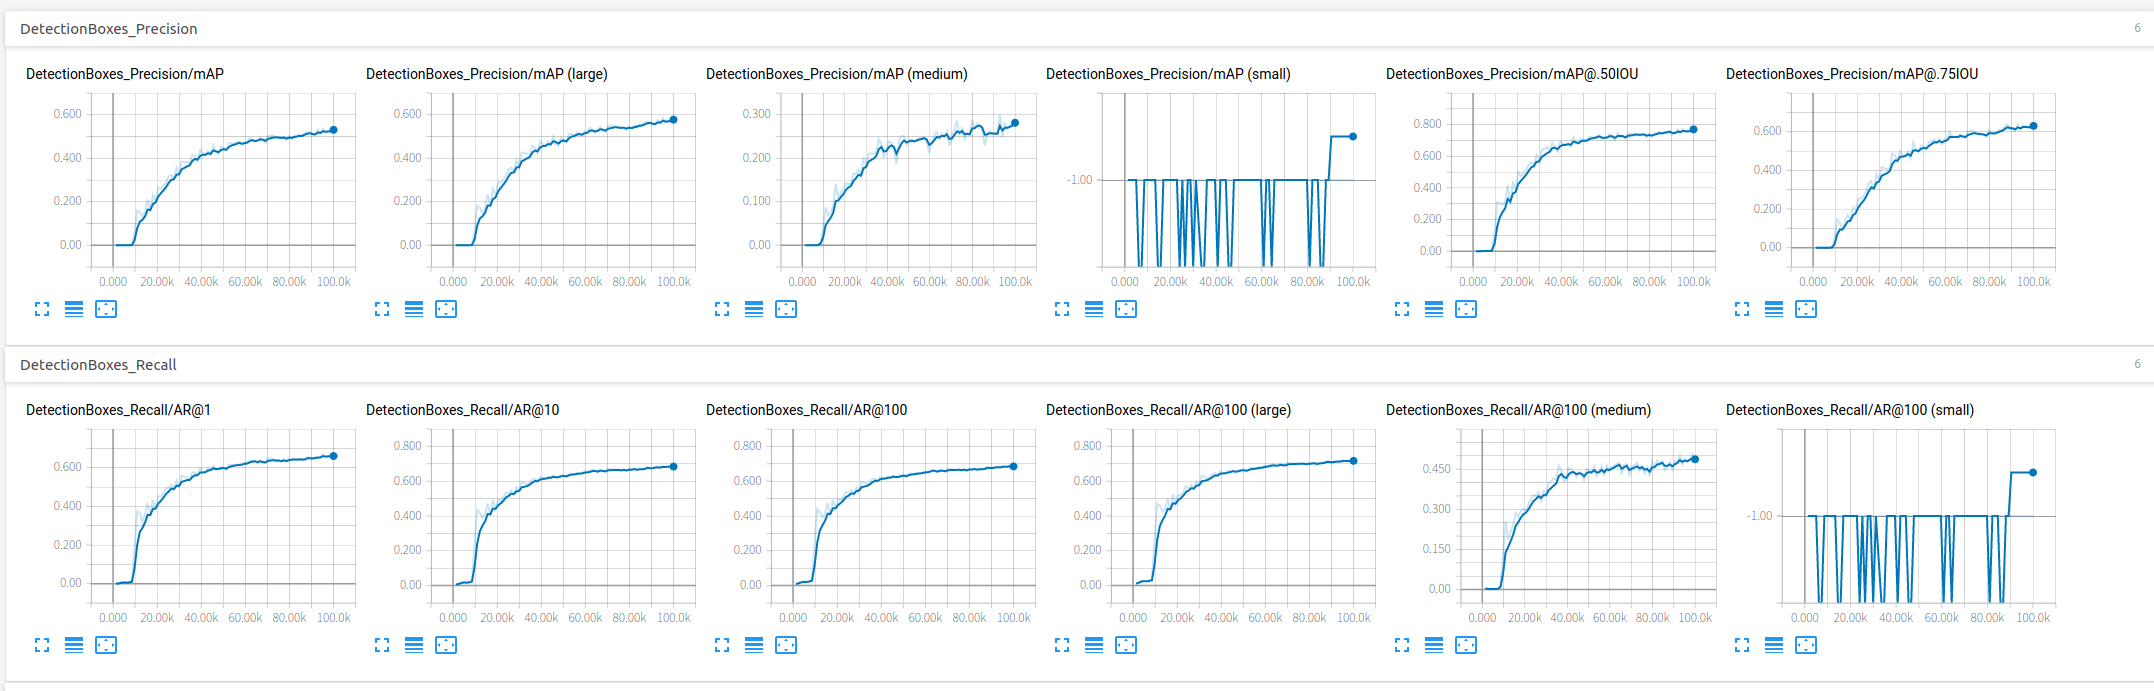
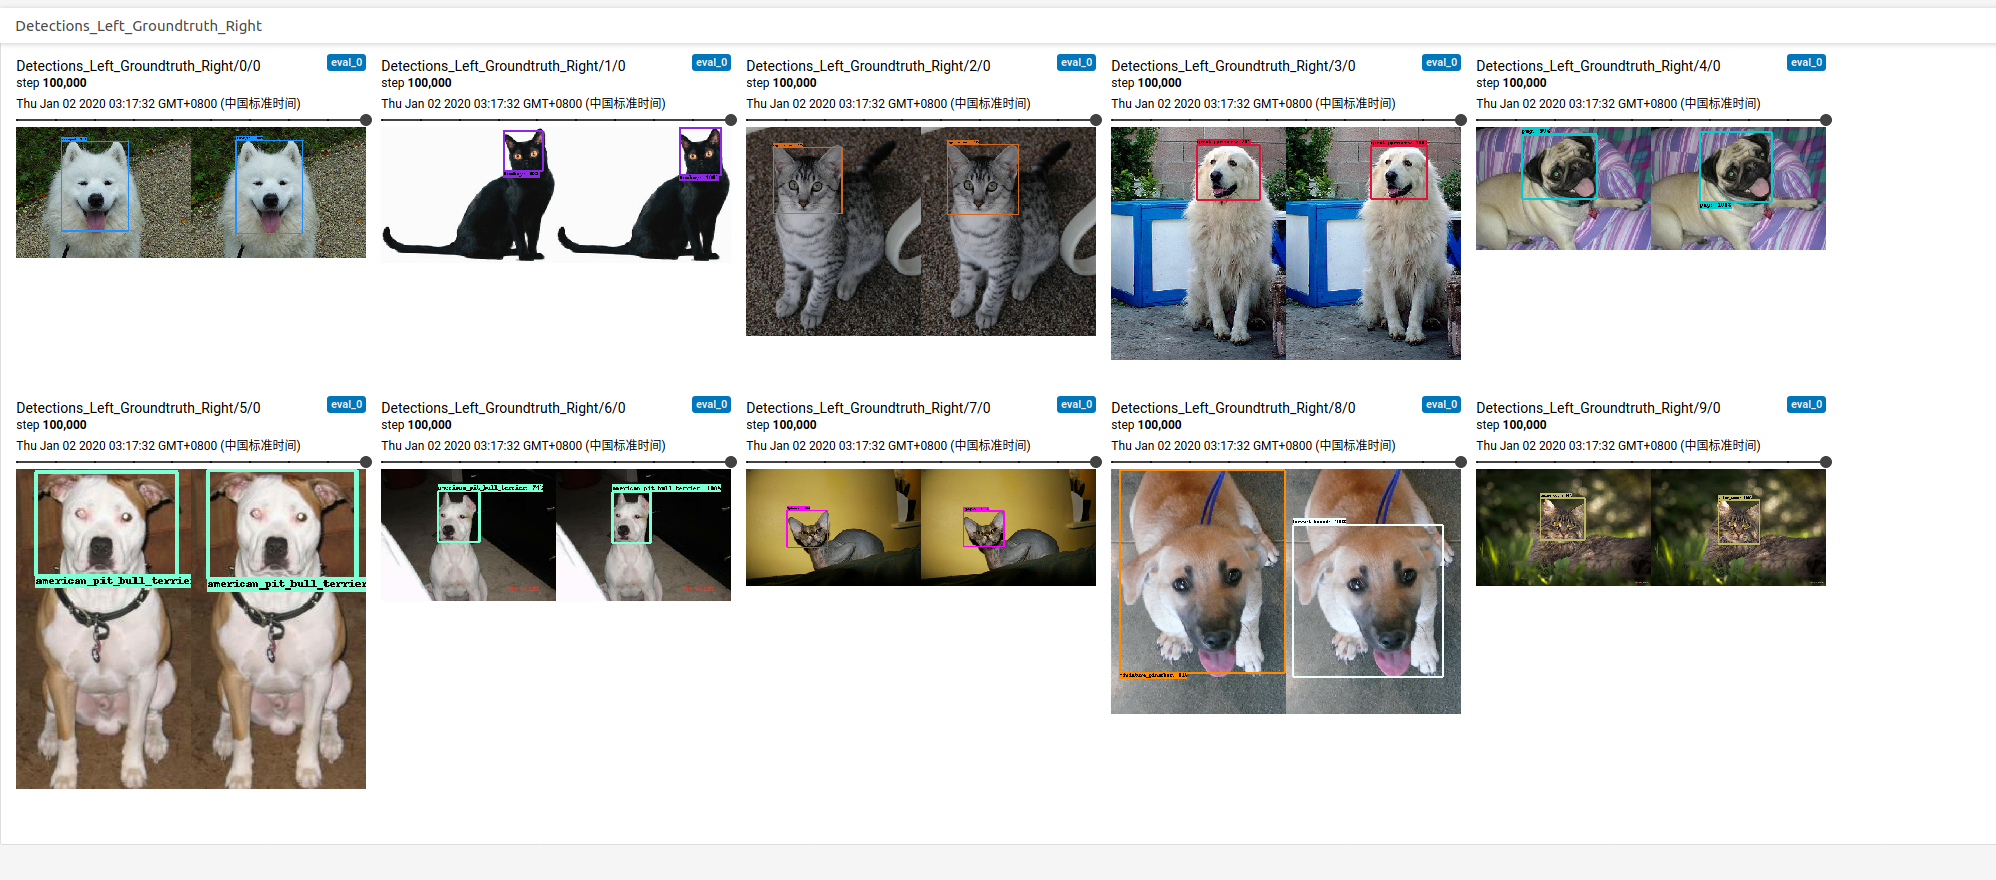
本次训练实际耗时16+小时,step10w,基本达到mAP@0.5IOU在测试集上78%的准确率;原始教程使用TPU只需要半小时即可达到该效果。
- 训练结果转化成tflite
graph文件转bp
1 | export CONFIG_FILE={path to pipeline config file} |
bp转tflite
1 | export OUTPUT_DIR=/research/tflite |
tflite文件大小6.1M
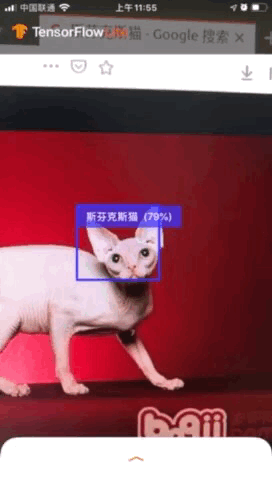
- 在移动端实现
直接讲生成的detect.tflite替换掉tensorflow官方object_detection项目中的tflite,并同步修改label文件,无需其他调整即可使用。
效果如图
有文章有疑问可以发邮件到lacusrinz@gmail.com与我交流